Meet Face ID and Touch ID for the Web
People often see passwords are the original sin of authentication on the web. Passwords can be easy to guess and vulnerable to breaches. Frequent reuse of the same password across the web makes breaches even more profitable. As passwords are made stronger and unique, they can quickly become unusable for many users. Passwords indeed look notorious, but are passwords themselves the problem, or is it their use as a sole factor for authentication?
Many believe the latter, and thus multi-factor authentication has become more and more popular. The introduction of a second factor does fix most of the security issues with passwords, but it inevitably makes the whole authentication experience cumbersome with an additional step. Therefore, multi-factor authentication has not become the de facto authentication mechanism on the web. Face ID and Touch ID for the web provides both the security guarantees of multi-factor authentication and ease of use. It offers multi-factor authentication in a single step. Using this technology, available on over a billion capable Apple devices, web developers can now broadly offer traditional multi-factor authentication with a smooth, convenient experience. And being built on top of the Web Authentication API makes Face ID and Touch ID phishing resistant as well.
This blog post extends the content of WWDC 2020 “Meet Face ID and Touch ID for the web” session by providing detailed examples to assist developers’ adoption of this new technology, including how to manage different user agent user interfaces, how to propagate user gestures from user-activated events to WebAuthn API calls, and how to interpret Apple Anonymous Attestation. This article will end by summarizing the unique characteristics of Apple’s platform authenticator and the current status of security key support. If you haven’t heard about WebAuthn before, you’re strongly encouraged to first watch the WWDC 2020 session, which covers the basic concepts. Otherwise, please enjoy.
Managing User Experiences
Although user agents are not required to offer UI guidance to users during WebAuthn flows, the reality is that all of them do. This allows user agents to share some of the burden from websites to manage the user experience, but it creates another complexity for websites as each user agent has a different way of presenting the WebAuthn ceremony in its UI. A WebAuthn ceremony could either be the authentication process or the registration process. This section presents how WebAuthn ceremony options map to WebKit/Safari’s UI and the recommended user experience for Face ID and Touch ID for the web.
One challenge is to manage different user experiences among the platform authenticator and security keys. Although the WebAuthn API allows presenting both options to the user simultaneously, it’s not the best approach. First, most users are probably only familiar with the branding of the platform authenticator, i.e., Face ID and Touch ID on Apple’s platforms, but are unfamiliar with security keys. Offering both at the same time can confuse users and make it difficult for them to decide what to do. Secondly, the platform authenticator has different behaviors and use cases from security keys. For example, Face ID and Touch ID are suitable for use as a more convenient, alternative mechanism to sign in when most security keys are not. And credentials stored in security keys can often be used across different devices and platforms while those stored in the platform authenticator are typically tied to a platform and a device. Therefore, it is better to present these two options to the user separately.
Presenting Face ID and Touch ID Alone
What follows is the recommended way to invoke Face ID and Touch ID for the web. Below is the corresponding Safari UI for registration ceremonies. Here, the Relying Party ID is picked to be displayed in the dialog.
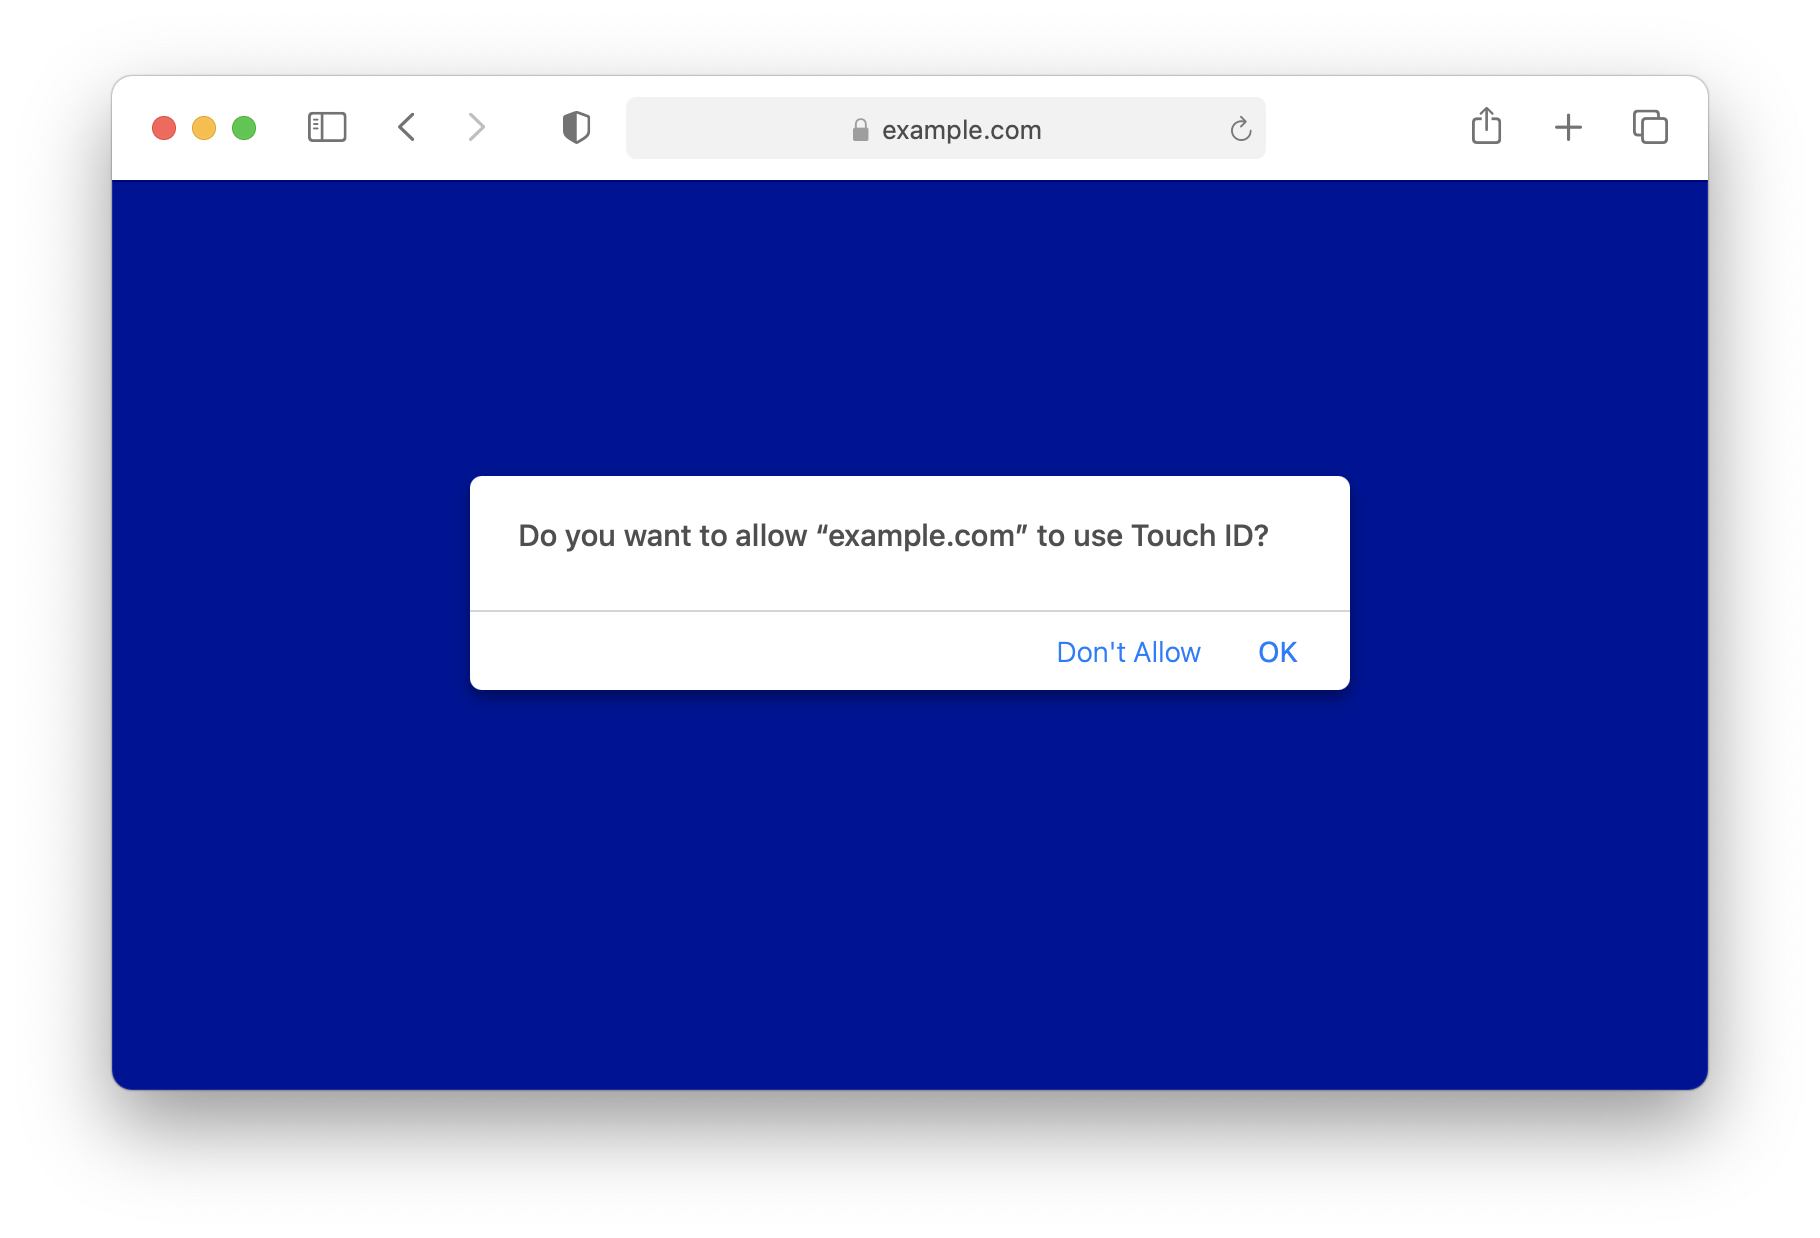
Here is the corresponding code snippet to show the above dialog.
const options = {
    publicKey: {
        rp: { name: "example.com" },
        user: {
            name: "john.appleseed@example.com",
            id: userIdBuffer,
            displayName: "John Appleseed"
        },
        pubKeyCredParams: [ { type: "public-key", alg: -7 } ],
        challenge: challengeBuffer,
        authenticatorSelection: { authenticatorAttachment: "platform" }
    }
};

const publicKeyCredential = await navigator.credentials.create(options);
The essential option is to specify authenticatorSelection: { authenticatorAttachment: "platform" } , which tells WebKit to only invoke the platform authenticator. After the publicKeyCredential is returned, one of the best practices is to store the Credential ID in a server-set, secure, httpOnly cookie, and mark its transport as "internal". This cookie can then be used to improve the user experience of future authentication ceremonies.
To protect users from tracking, the WebAuthn API doesn’t allow websites to query the existence of credentials on a device. This important privacy feature, however, requires some extra effort for websites to store provisioned Credential IDs in a separate source and query it before the authentication ceremony. The separate source is often on the backend server. This practice works well for security keys given that they can be used across platforms. Unfortunately, it does not work for the platform authenticator as credentials can only be used on the device where they were created. A server-side source cannot tell whether or not a particular platform authenticator indeed preserves a credential. Hence, a cookie is especially useful. This cookie should not be set through the document.cookie API since Safari’s Intelligent Tracking Prevention caps the expiry of such cookies to seven days. It’s also important to mark those credentials as "internal" such that websites could supply it in the authentication ceremony options to prevent WebKit from asking users for security keys at the same time.
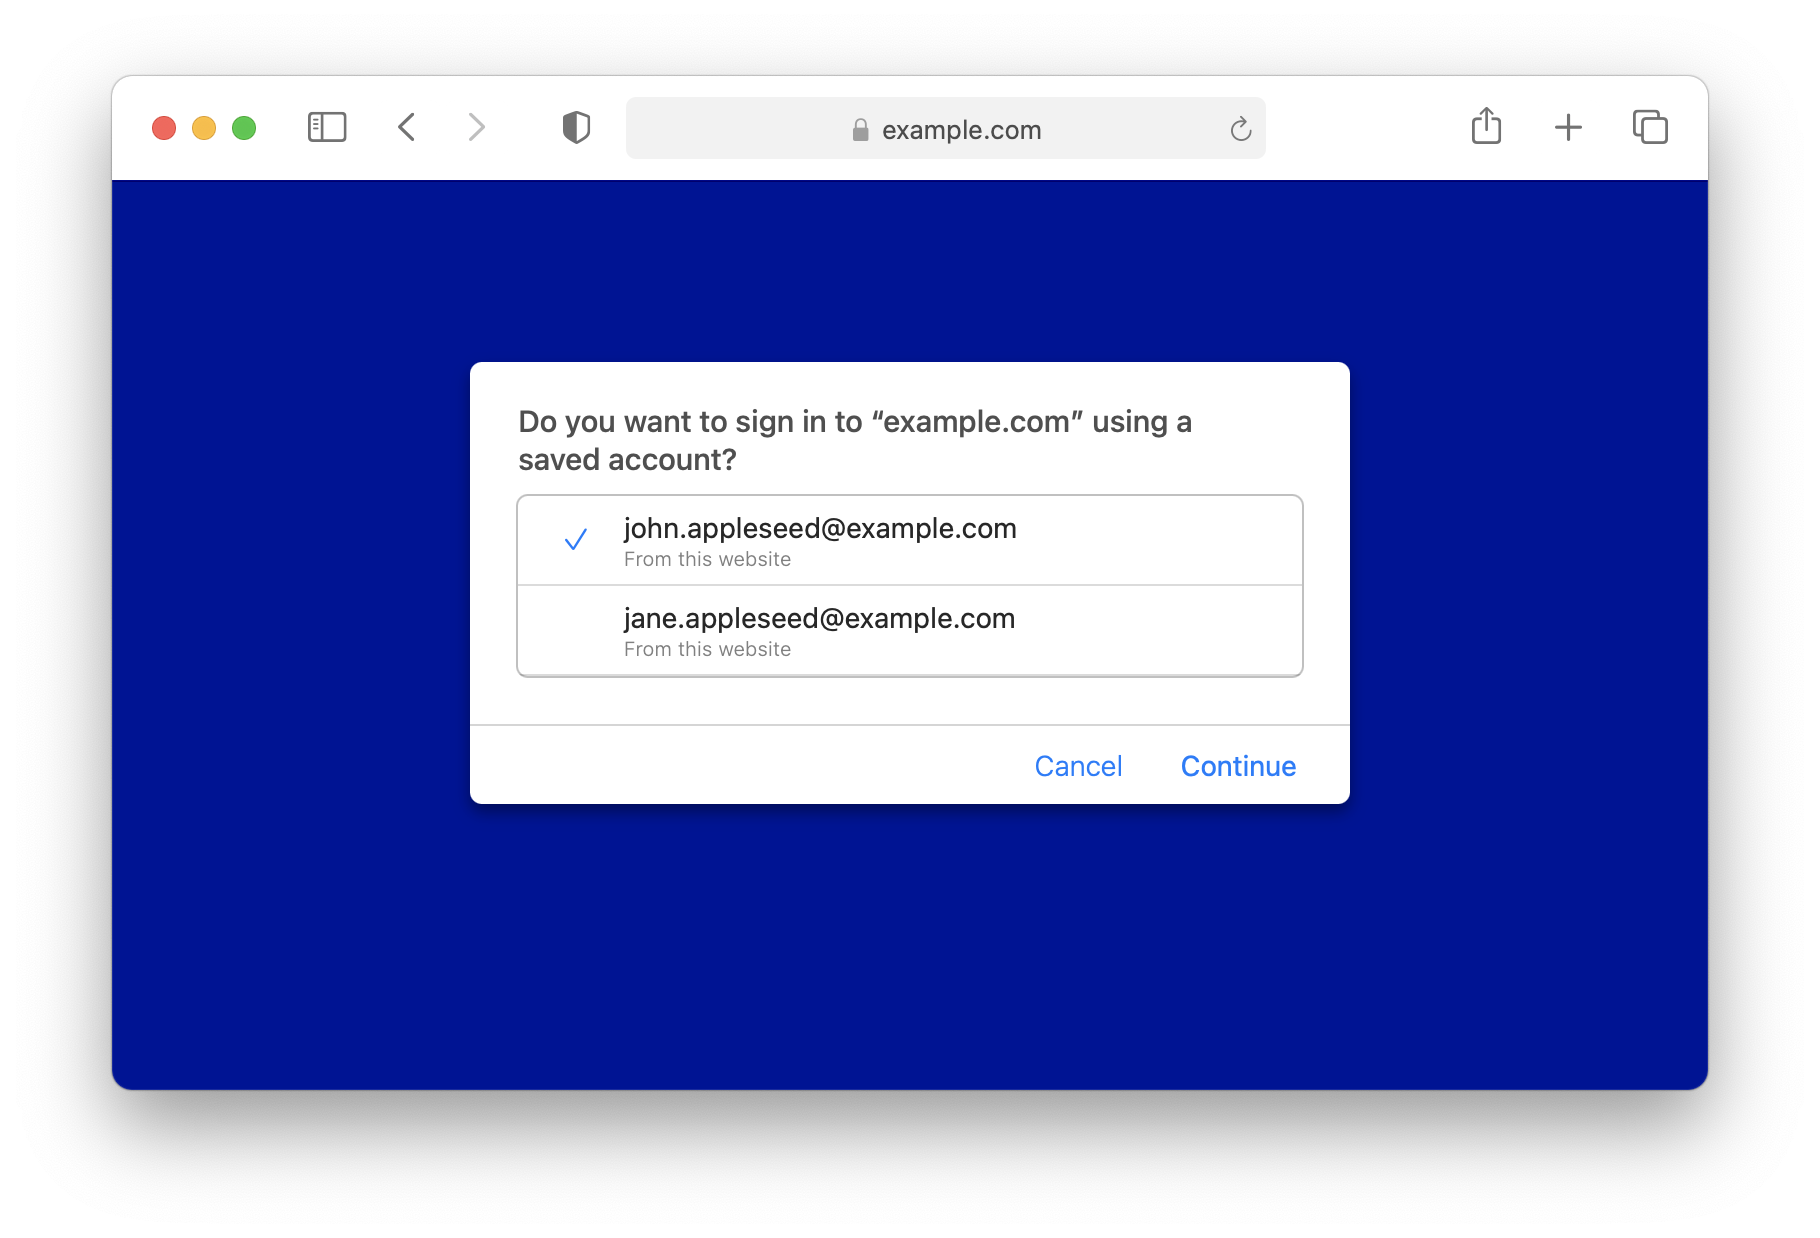
Below are two different UIs for authentication ceremonies. The first one is streamlined for the case where the user agent only has a single credential, while the second one shows how the user agent allows the user to select one of many credentials. For both cases, only user.name submitted in the registration ceremony is selected to display. For the second case, the order of the list is sorted according to the last used date of the credential. WebKit keeps track of the last used date. Websites thus do not need to worry about it.
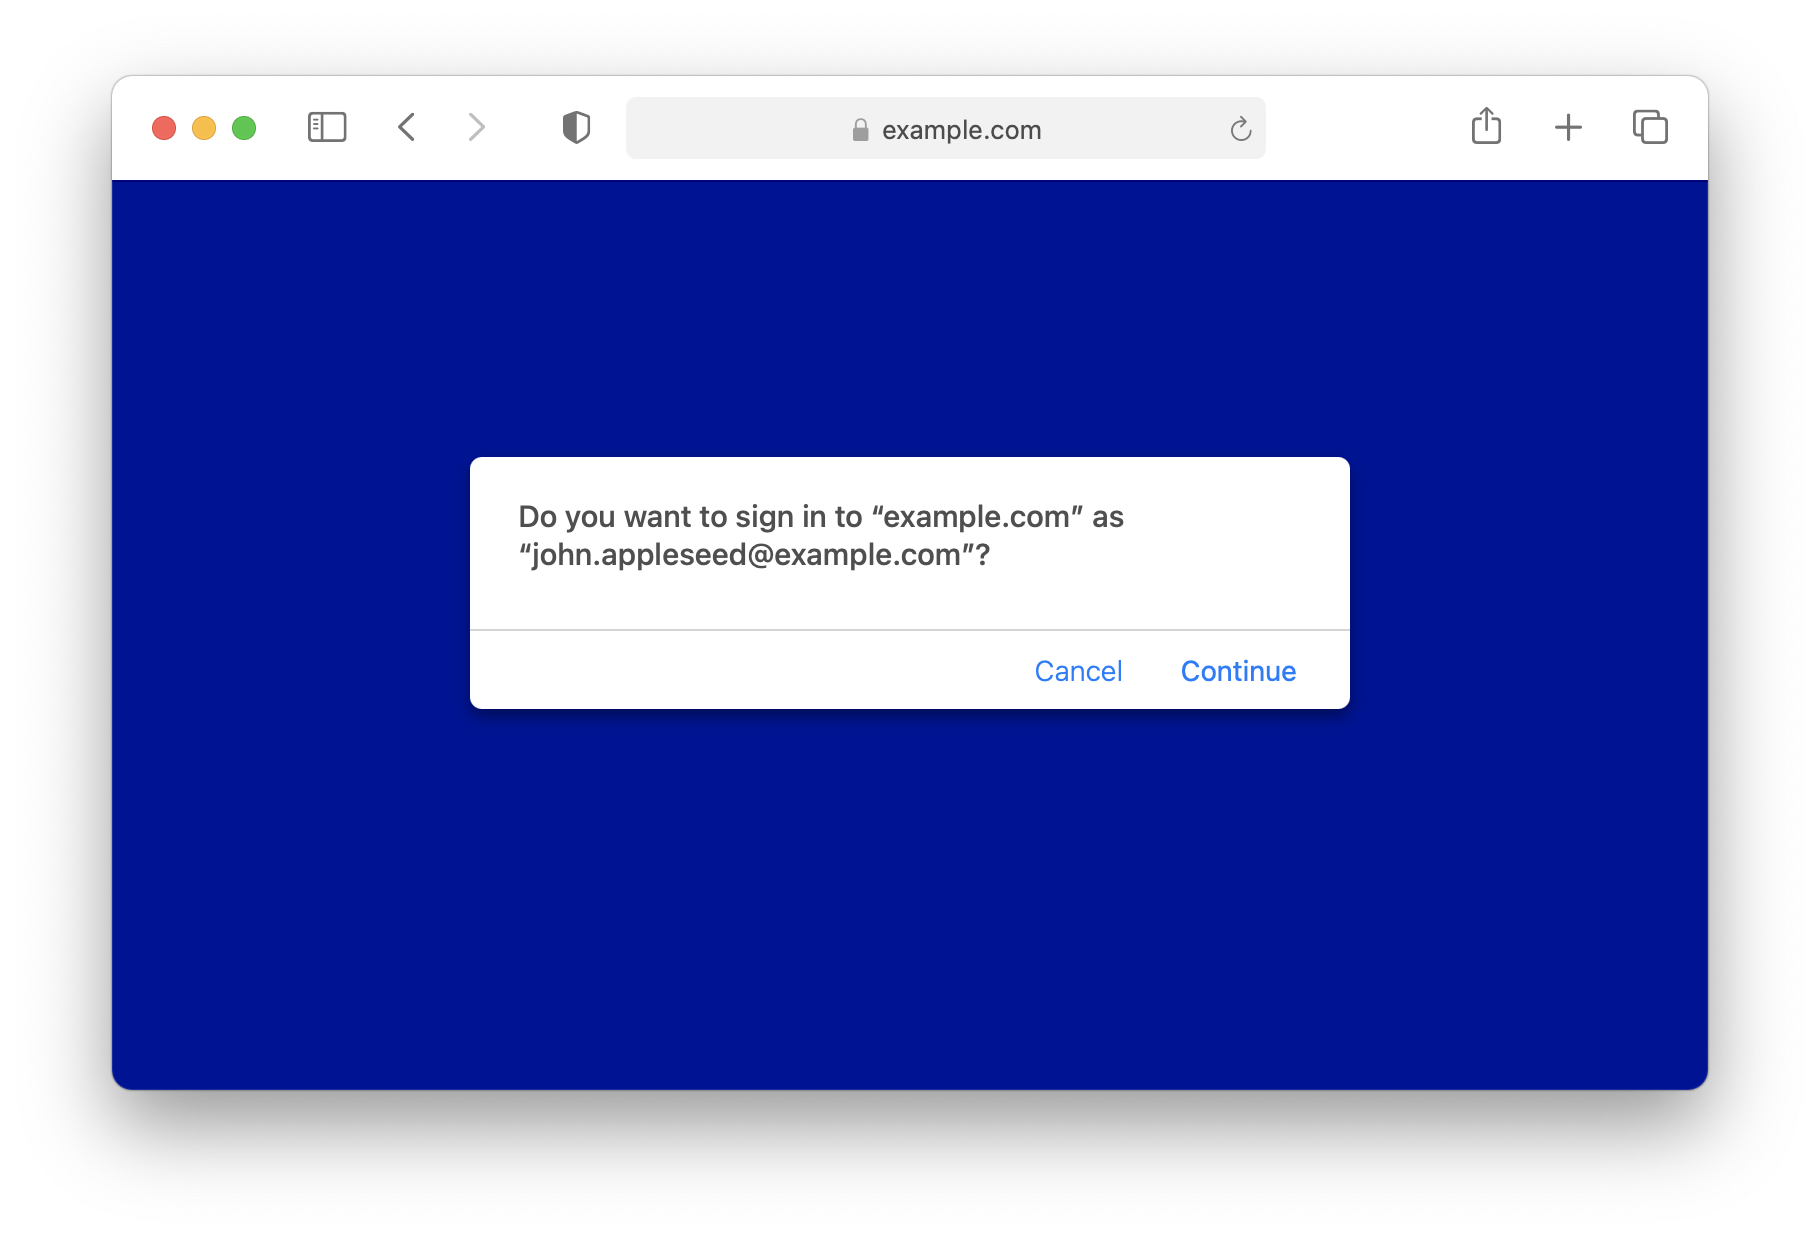
Here is the corresponding code snippet to show the above dialogs.
const options = {
    publicKey: {
        challenge: challengeBuffer,
        allowCredentials: [
            { type: "public-key", id: credentialIdBuffer1, transports: ["internal"] },
            // ... more Credential IDs can be supplied.
        ]
    }
};

const publicKeyCredential = await navigator.credentials.get(options);
To be noted, even though an improvement over WebKit can be made such that transports: ["internal"] is not necessary to prevent WebKit from asking users for security keys as long as all allowed credentials are found within the platform authenticator, it is for the happy path only. In the case where no credentials are found, this extra property can tell WebKit to show an error message instead of asking the user for security keys.
Presenting Face ID and Touch ID along with Security Keys
Despite the fact that the following usage is discouraged, WebKit/Safari has prepared dedicated UI to allow the user to select a security key in addition to the platform authenticator. Below is the one for registration ceremonies.
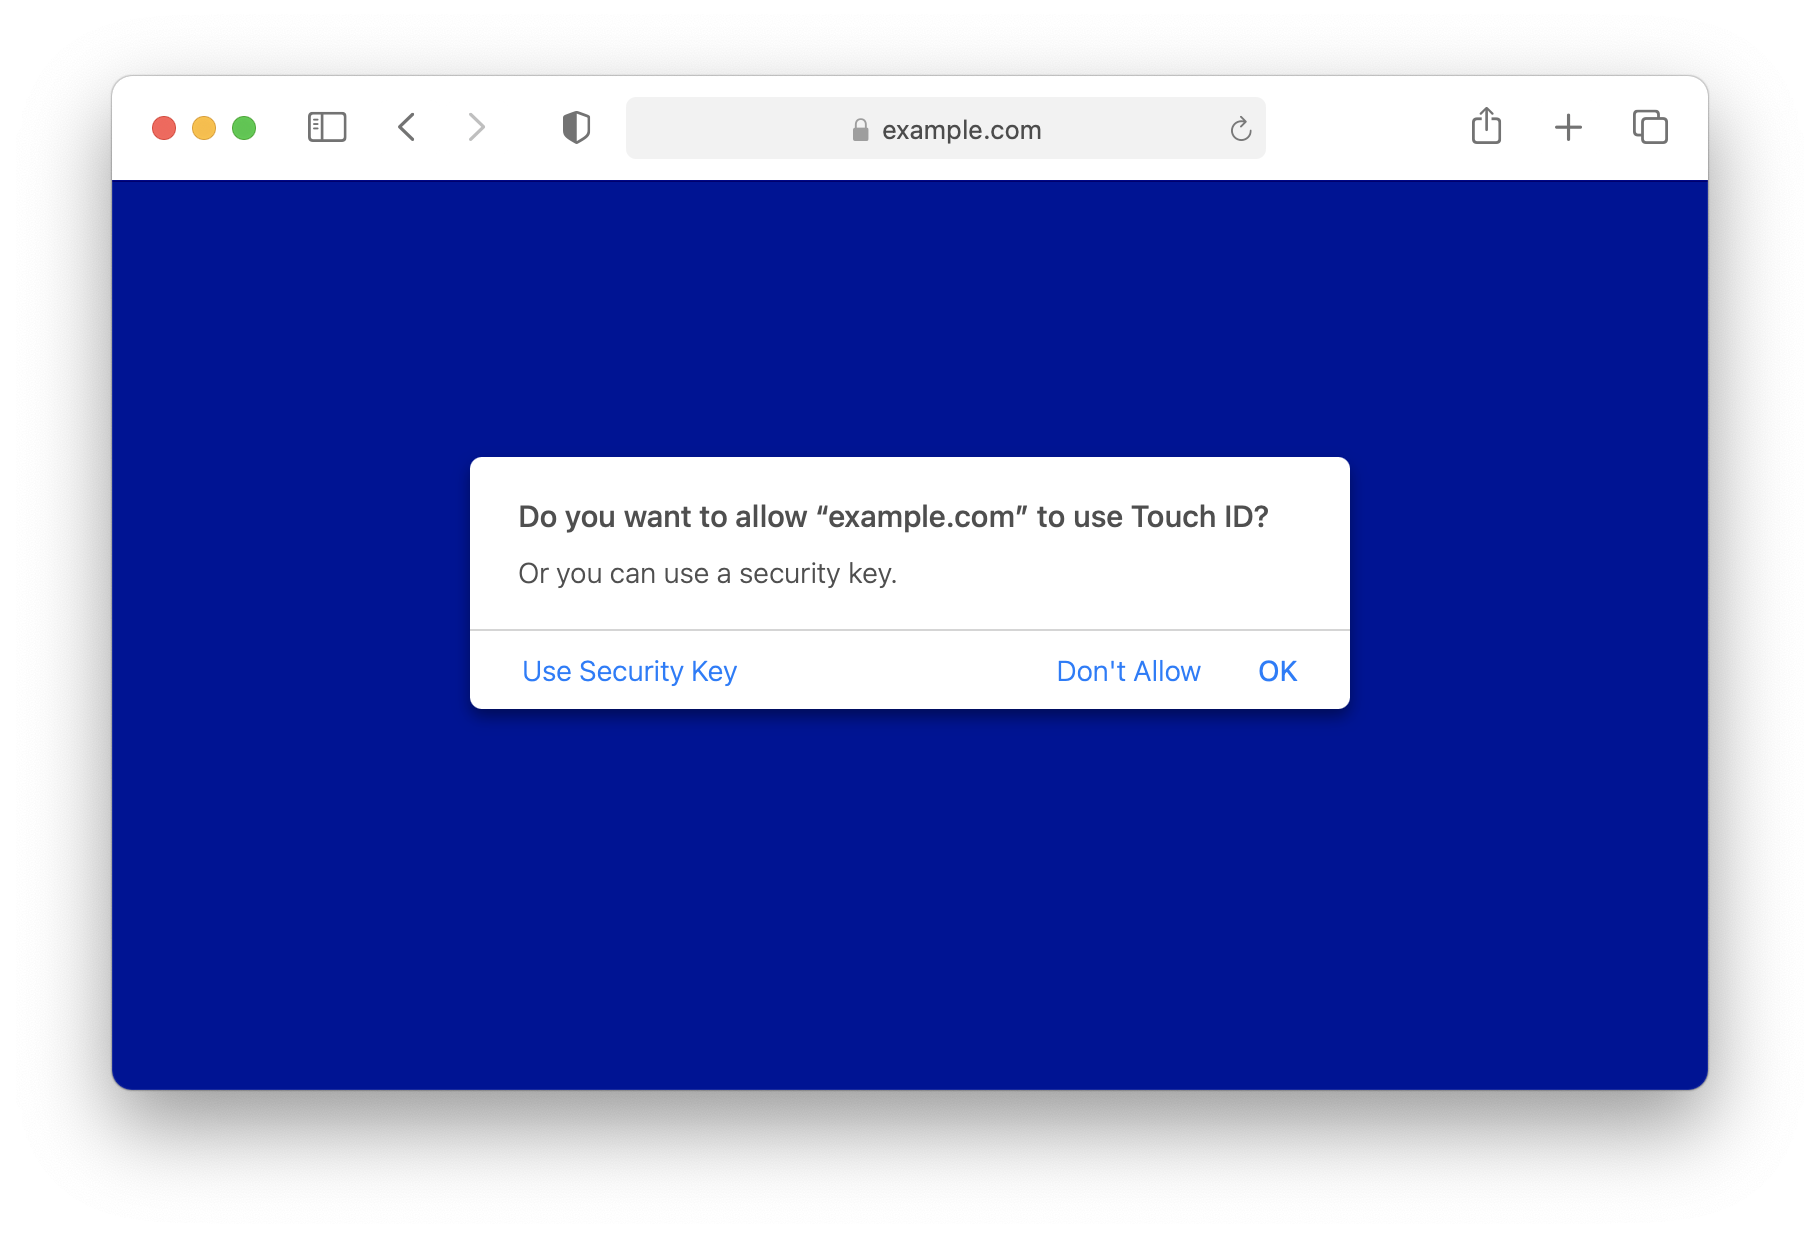
The above dialog can be obtained by deleting authenticatorSelection: { authenticatorAttachment: "platform" } from the registration ceremony code snippet above.
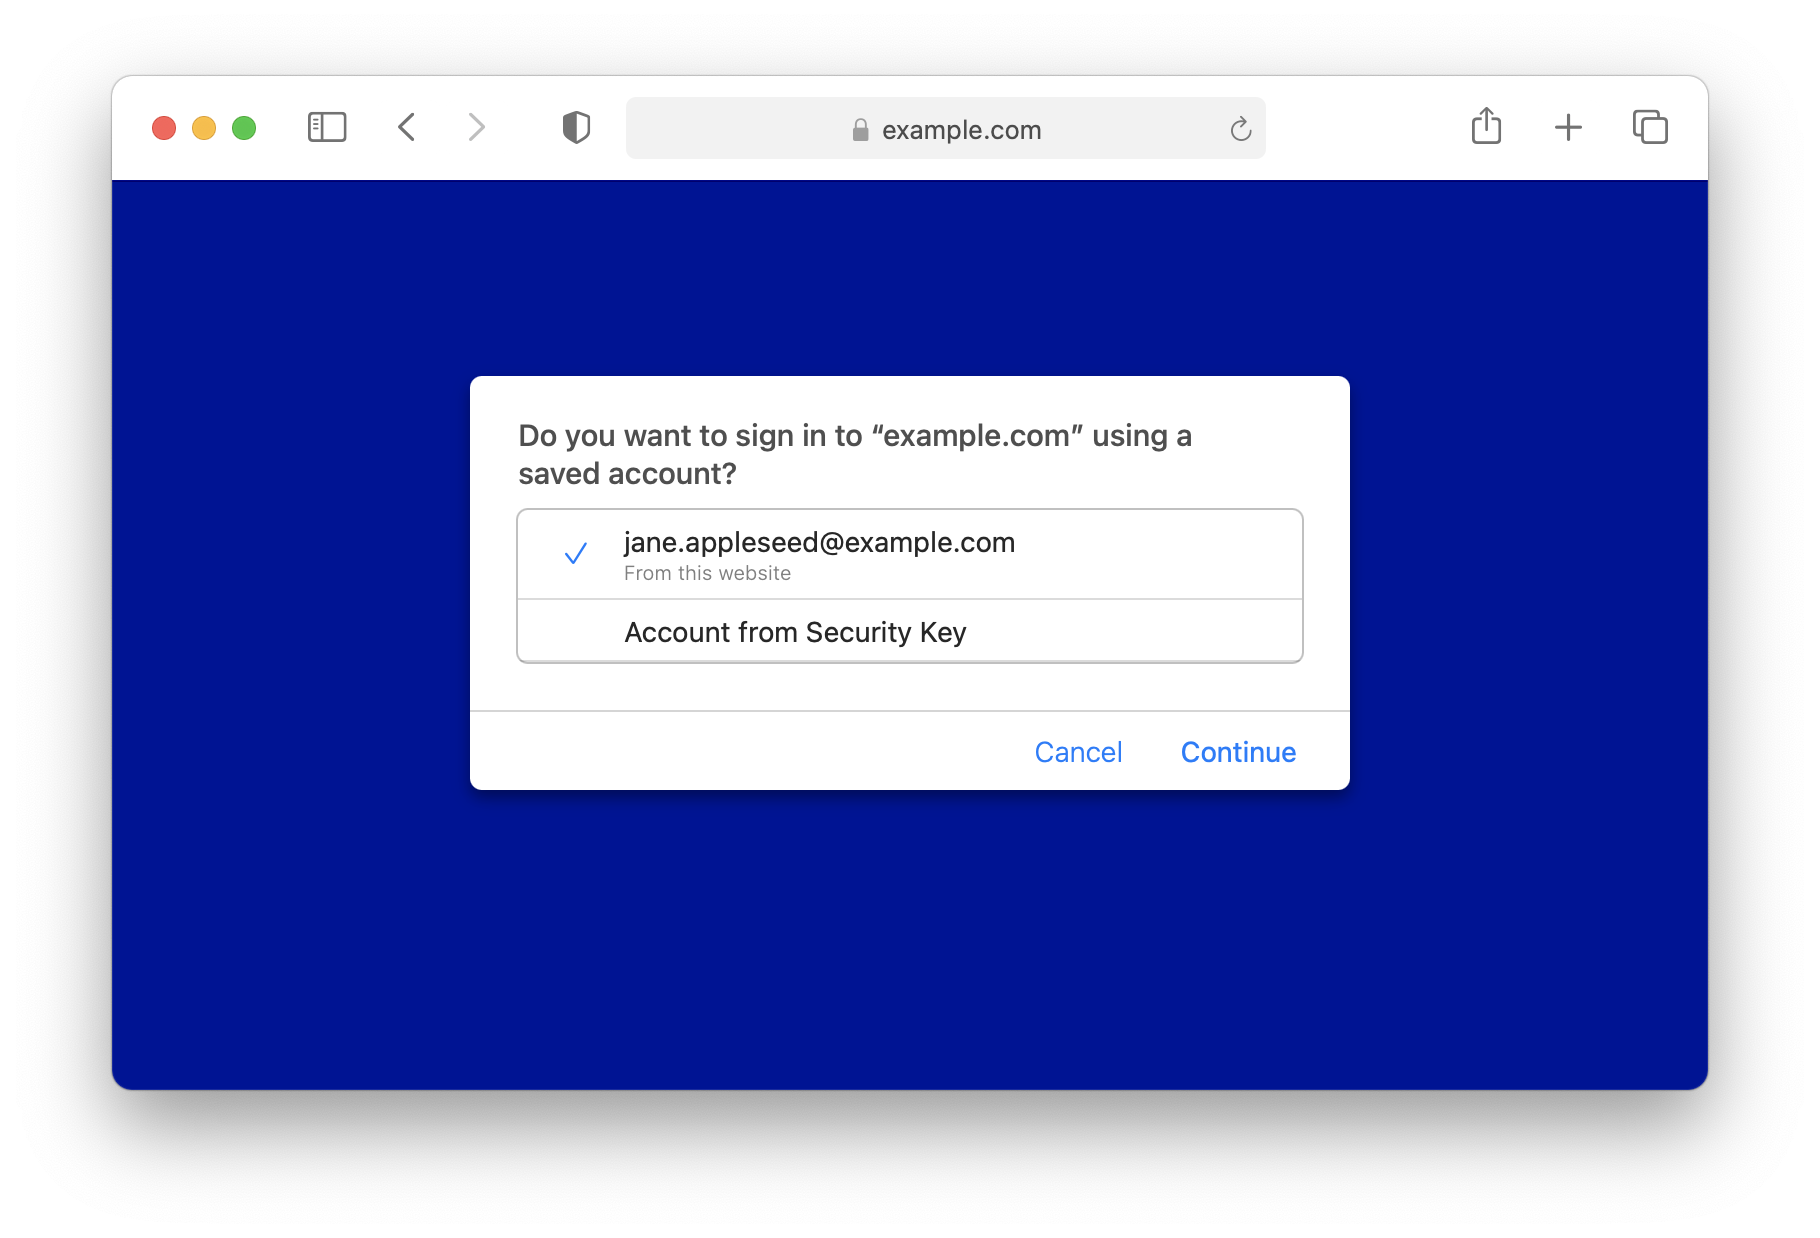
The above dialog will be shown if any entry in the allowCredentials array from the authentication ceremony code snippet above doesn’t have the transports: ["internal"] property.
To be noted, security keys can be used immediately in both cases after the UI is shown. “Use Security Key” and “Account from Security Key” options are there to show instructions of how to interact with security keys.
Specifying allowCredentials or not
allowCredentials is optional for authentication ceremonies. However, omitting it will result in undetermined behavior in WebKit/Safari’s UI. If credentials are found, the authentication ceremony UI above will be shown. If no credentials are found, WebKit will ask the user for their security keys. Therefore, it is highly recommended not to omit this option.
Propagating User Gestures
Unsolicited permission prompts are annoying. Mozilla has conducted surveys [1, 2] that verify this. Even though WebAuthn prompts are not as often seen on the web as notification prompts today, this situation will change with the release of Face ID and Touch ID for the web.
Websites don’t ask for notification permission for fun. They ask because notifications can bring users back to their sites and increase their daily active users metric. A similar financial incentive could be found with WebAuthn prompts especially when platform authenticators are available as a fulfilled authentication request results in a high fidelity, persistent unique identifier of the user. This is a universal truth about authentication and that is why many sites ask for it before users even interact with the site. Though it is inevitable that WebAuthn credential will be leveraged to serve targeted ads to users, at least a similar protection that Mozilla did in Firefox for notification permission prompts can be utilized to make those WebAuthn prompts less annoying to users, which is to require user gestures for the WebAuthn API to eliminate annoying ‘on load’ prompts.
We foresaw this problem some time ago and filed an issue on the WebAuthn specification, but it didn’t get much traction back then. One reason is that it is a breaking change. Another reason is that the risk is not as high with security keys since they are not that popular and not always attached to the platform. The amount of unsolicited prompts has been surprisingly low. The situation is different with the release of Face ID and Touch ID for the web. So, Face ID and Touch ID for the web require user gestures to function. (User gestures are not required for security keys for backward compatibility.)
A user gesture is an indicator to signal WebKit that the execution of the current JavaScript context is a direct result of a user interaction, or more precisely from a handler for a user activated event, such as a touchend, click, doubleclick, or keydown event [3]. Requiring user gestures for the WebAuthn API means API calls must happen within the above JavaScript context. Normally, the user gesture will not be propagated to any async executors within the context. Since it is popular for websites to fetch a challenge asynchronously from a server right before invoking WebAuthn API, WebKit allows WebAuthn API to accept user gestures propagated through XHR events and the Fetch API. Here are examples of how websites can invoke Face ID and Touch ID for the web from user activated events.
Calling the API Directly from User Activated Events
// Fetching the challengeBuffer before the onclick event.

button.addEventListener("click", async () => {
    const options = {
        publicKey: {
            ...
            challenge: challengeBuffer,
            ...
        }
    };

    const publicKeyCredential = await navigator.credentials.create(options);
});
Propagating User Gestures Through XHR Events
button.addEventListener("click", () => {
    const xhr = new XMLHttpRequest();
    xhr.onreadystatechange = async function() {
        if (this.readyState == 4 && this.status == 200) {
            const challenge = this.responseText;
            const options = {
                publicKey: {
                    ...
                    challenge: hexStringToUint8Array(challenge), // a custom helper
                    ...
                }
            };

            const publicKeyCredential = await navigator.credentials.create(options);
        }
    };
    xhr.open("POST", "/WebKit/webauthn/challenge", true);
    xhr.setRequestHeader("Content-type", "application/x-www-form-urlencoded");
    xhr.send();
});
Propagating User Gestures Through Fetch API
button.addEventListener("click", async () => {
    const response = await fetch("/WebKit/webauthn/challenge", { method: "POST" });
    const challenge = await response.text();

    const options = {
        publicKey: {
            ...
            challenge: hexStringToUint8Array(challenge), // a custom helper
            ...
        }
    };
    const publicKeyCredential = await navigator.credentials.create(options);
});
To be noted, readable streams cannot propagate user gestures yet (related bug). Also, the user gesture will expire after 10 seconds for both XHR events and Fetch API.
Easter Egg: Propagating User Gestures Through setTimeout
button.addEventListener("click", () => {
    setTimeout(async () => {
        const options = { ... };
        const publicKeyCredential = await navigator.credentials.create(options);
    }, 500);
});
The user gesture in the above example will expire after 1 second.
On iOS 14, iPadOS 14 and macOS Big Sur Beta Seed 1, only the very first case is supported. Thanks to early feedback from developers, we were able to identify limitations and add the later cases. This also helped us recognize that user gestures are not a well understood concept among web developers. Therefore, we are going to contribute to the HTML specification and help establish a well established concept of a user gesture for consistency among browser vendors. Depending on how it goes, we might reconsider expanding the user gesture requirement to security keys.
Interpreting Apple Anonymous Attestation
Attestation is an optional feature which provides websites a cryptographic proof of the authenticator’s provenance such that websites that are restricted by special regulations can make a trust decision. Face ID and Touch ID for the web offers Apple Anonymous Attestation. Once verified, this attestation guarantees that an authentic Apple device performed the WebAuthn registration ceremony, but it does not guarantee the operating system running on that device is untampered. If the operating system is untampered, it also guarantees that the private key of the just generated credential is protected by the Secure Enclave and the usage of the private key is guarded with Face ID or Touch ID. (A note: the guard falls back to device passcode if biometric fails multiple times in a row.)
Apple Anonymous Attestation is first of its kind, providing a service like an Anonymization CA, where the authenticator works with a cloud operated CA owned by its manufacturer to dynamically generate per-credential attestation certificates such that no identification information of the authenticator will be revealed to websites in the attestation statement. Furthermore, among data relevant to the registration ceremony, only the public key of the credential along with a hash of the concatenated authenticator data and client data are sent to the CA for attestation, and the CA will not store any of these. This approach makes the whole attestation process privacy preserving. In addition, this approach avoids the security pitfall of Basic Attestation that the compromising of a single device results in revoking certificates from all devices with the same attestation certificate.
Enabling Apple Anonymous Attestation
const options = {
    publicKey: {
        ...
        attestation: "direct", // the essential option
        ...
    }
};

const publicKeyCredential = await navigator.credentials.create(options);
Verifying the Statement Format
This is the definition of the Apple Anonymous Attestation statement format. Issue 1453 is tracking the progress of adding this statement format to the WebAuthn standard.
$$attStmtType //= (
                       fmt: "apple",
                       attStmt: appleStmtFormat
                   )

appleStmtFormat = {
                       x5c: [ credCert: bytes, * (caCert: bytes) ]
                   }
The semantics of the above fields are as follows:
x5c
credCert followed by its certificate chain, each encoded in X.509 format.
credCert
The credential public key certificate used for attestation, encoded in X.509 format.
Here is the verification procedure given inputs attStmt, authenticatorData and clientDataHash:
- Verify that attStmt is valid CBOR conforming to the syntax defined above and perform CBOR decoding on it to extract the contained fields.
- Concatenate authenticatorData and clientDataHash to form nonceToHash.
- Perform SHA-256 hash of nonceToHash to produce nonce.
- Verify nonce matches the value of the extension with OID ( 1.2.840.113635.100.8.2 ) in credCert. The nonce here is used to prove that the attestation is live and to protect the integrity of the authenticatorData and the client data.
- Verify credential public key matches the Subject Public Key of credCert.
- If successful, return implementation-specific values representing attestation type Anonymous CA and attestation trust path x5c.
The final step is to verify x5c is a valid certificate chain starting from the credCert to the Apple WebAuthn root certificate, which then proves the attestation. (This step is usually shared among different types of attestations that utilize x5c [4].) To be noted, the AAGUID is all zeros even if the attestation is enabled as all Apple devices that support Face ID and Touch ID for the web should have the same properties as explained at the beginning of this section and no other devices can request Apple Anonymous Attestation.
Unique Characteristics of Apple’s Platform Authenticator
Here is a summary about unique characteristics of Apple’s platform authenticator, i.e., Face ID and Touch ID for the web.
- Different option set results in different UI, and therefore please specify it wisely.
- Only RP ID and user.name are selected to display in the UI.
- User gestures are required to invoke the platform authenticator.
- Apple Anonymous Attestation is available. Use it only if attestation is necessary for you.
- AAGUID is all zero even if attestation is used.
- Face ID and Touch ID for the web is available in Safari, SFSafariViewController and ASWebAuthenticationSession on iOS 14, iPadOS 14 and macOS Big Sur. For macOS, Safari 14 with downlevel OS will not get this feature because the attestation relies on a new system framework.
- All public key credentials generated by the platform authenticator are resident keys regardless of what option is specified.
- Credentials can only be cleared for all via Safari > History > Clear History… on Mac Safari or Settings > Safari > Clear History and Website Data on iOS & iPadOS.
- The signature counter is not implemented and therefore it is always zero. Secure Enclave is used to prevent the credential private key from leaking instead of a software safeguard.
Current Status of Security Key Support
Besides the introduction of Face ID and Touch ID for the web, iOS 14, iPadOS 14 and Safari 14 on all supported macOS also have improved security key support including PIN entry and account selection. Here is a list of features that are currently supported. All of them have been supported since iOS 13.3, iPadOS 13.3 and Safari 13 except the two aforementioned.
- All MUST features in WebAuthn Level 1 and all optional features except CollectedClientData.tokenBinding and most of the extensions. Only the appid extension is supported.
- All CTAP 2.0 authenticator API except setPin and changePin.
- USB, Lightning, and NFC transports are supported on capable devices.
- U2F security keys are supported via CTAP 2.0 but not CTAP 1/U2F JS.
- Like Face ID and Touch ID for the web, security key support is available in Safari, SFSafariViewController and ASWebAuthenticationSession.
Feedback
In this blog post, we introduced Face ID and Touch ID for the web. We believe it is a huge leap forward for authentication on the web. It serves as a great alternative way to sign in, especially for traditional multi-factor authentication mechanisms. With the assistance of this technology, we believe multi-factor authentication will replace sole-factor password as the de facto authentication mechanism on the web. Developers, please start testing this feature today and let us know how it works for you by sending feedback on Twitter (@webkit, @alanwaketan, @jonathandavis) or by filing a bug.