Discover MapKit JS 6:
Rebuilt for Today’s Web Developer
MapKit JS allows you to bring the power and simplicity of Apple Maps to your website or web app. Whether you’re building a store locator, a travel planner, or a companion web experience for a native app, MapKit JS offers you a robust, privacy-first framework, providing the mapping data, services, and design quality behind Apple Maps, directly to your JavaScript code.
If you haven’t tried MapKit JS lately, now is a great time to take another look. With our latest version 6 release, we’ve made it easier than ever for you to integrate MapKit JS into your apps and websites by modernizing around today’s web development patterns.
See It in Action
Getting a MapKit JS map onto a page takes a few lines of code. In this post, we’ll guide you, step-by -step, through how to build a sample app — Yosemite Explorer — featuring points of interest across Yosemite National Park in California. Explore the demo.
Try it yourself
Apple Developer Account
To display a map, provide a developer token to MapKit JS. You generate that token through an Apple Developer account — and that same account unlocks a lot more than just maps. With an Apple Developer account, you get access to Apple’s full suite of developer services: publish Safari Web Extensions, and use powerful web frameworks like MusicKit JS for Apple Music integration, CloudKit JS for iCloud-backed data storage, and more. Sign up for an Apple Developer account.
MapKit JS 6 makes token setup significantly simpler. You can now use a static token bound to your website’s domain, generated directly from the Apple Developer website — no private key management or self-signing required. For details, see Creating a Maps token.
Load the Framework
New in v6, the MapKit JS loader ships as an NPM package, so the framework integrates directly into modern build pipelines. If you are looking to build a quick prototype or load MapKit JS directly in HTML, you can also skip to [Loading the MapKit JS script in your browser] below.
Load with MapKit JS Loader
To get our Yosemite map running, the next step is to install the package:
npm install @apple/mapkit-loader
Now you can load the framework with the token you generated in the previous step:
import { load } from "@apple/mapkit-loader";
const mapkit = await load({
libraries: ["map", "services", "annotations"],
token: "your-token-here"
});
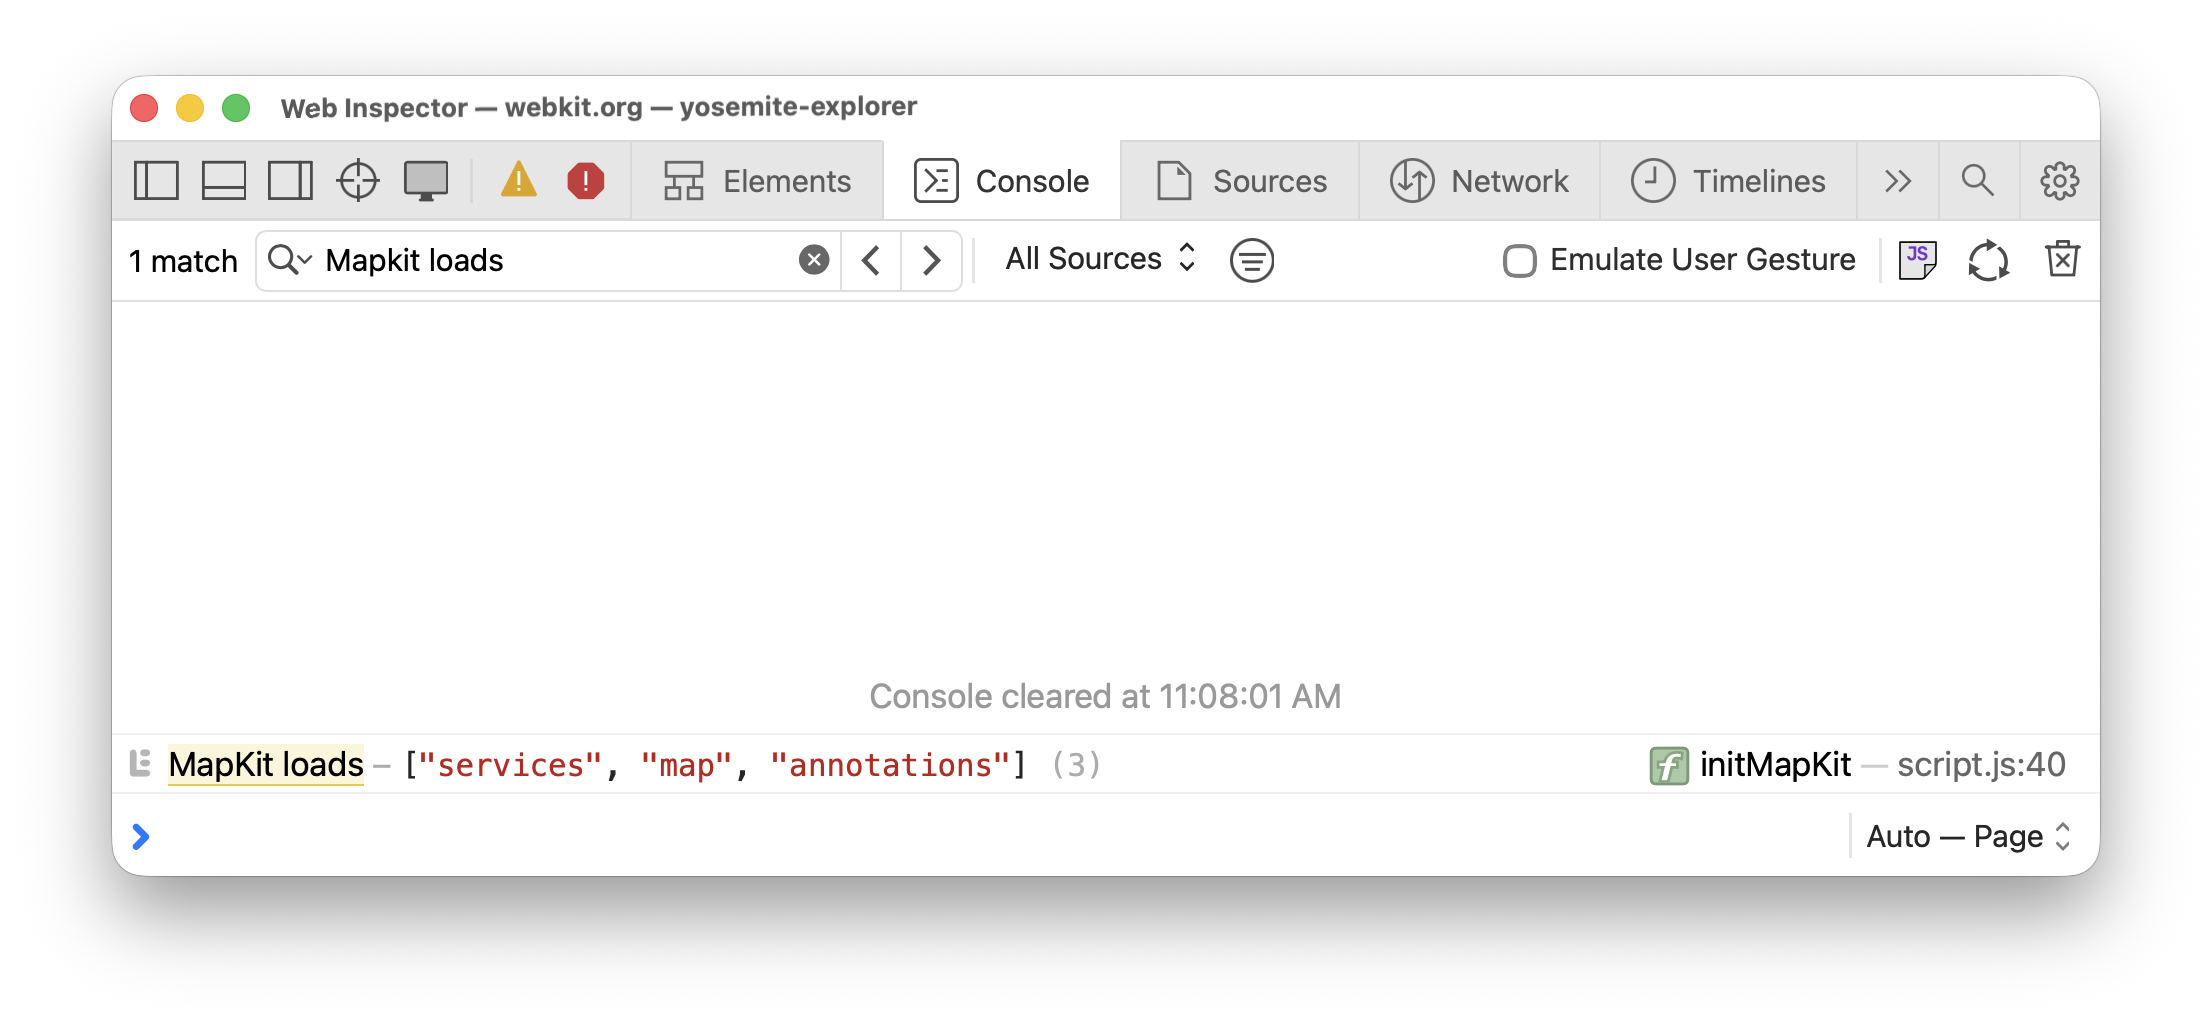
console.log("MapKit loads", mapkit.loadedLibraries);
Let’s reload the page. The console.log() output should appear in Web Inspector:
MapKit JS partitions its features into libraries, so you load only what you need. Set the libraries array to the minimal set for the best performance. When you load MapKit JS through MapKit JS Loader, it automatically sources full TypeScript support through DefinitelyTyped into your project. Find a list of available libraries in developer documentation for MapKit JS.
Alternative: Load the MapKit JS script in HTML
For quick prototyping or web apps without a build pipeline, you can load and initialize MapKit JS with a <script> tag:
<script src="https://cdn.apple-mapkit.com/mk/6/mapkit.core.js"
     crossorigin async
     data-callback="initMapKit"
     data-libraries="map,services,annotations"
     data-token="your-token-here"></script>
When the script loads, it invokes window.initMapKit — a callback you define — after which the mapkit namespace is available under window.
Create a Map
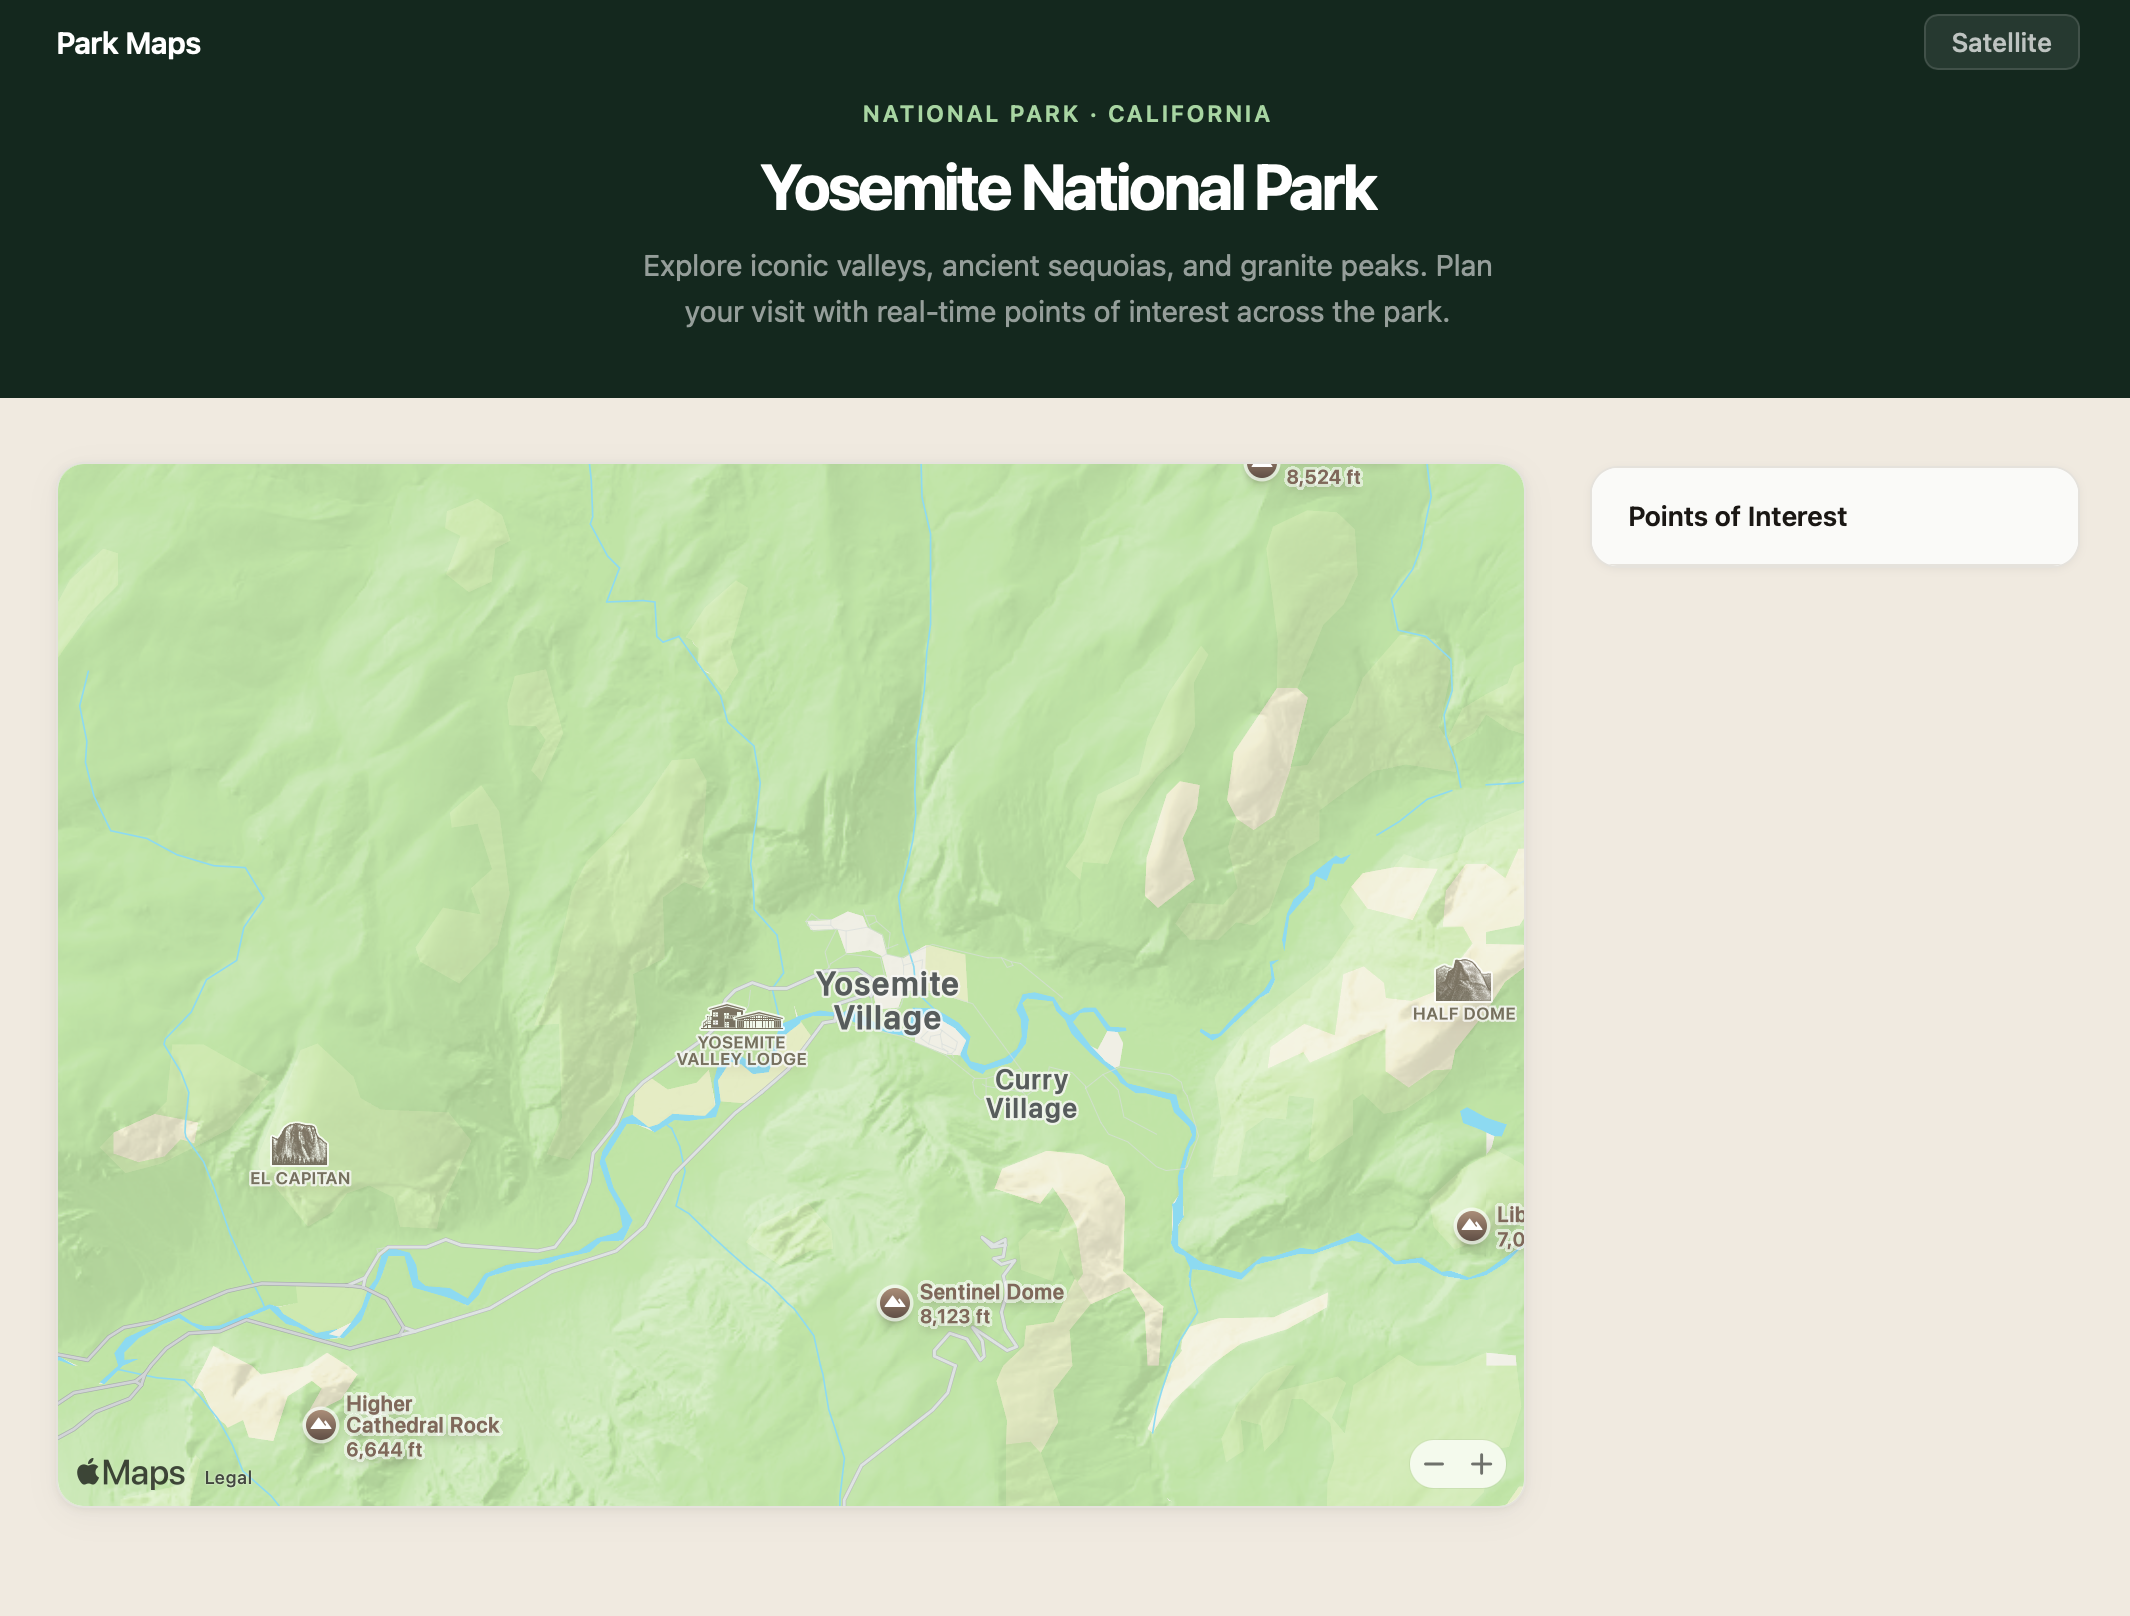
You create a map by passing the ID of a container element and a region. For our example, we center the map view on Yosemite Valley and set the camera high enough to cover the whole valley.
First, in HTML, define a sized container for the map view:
<div id="map-container" style="width: 500px; height: 500px;"></div>
In JavaScript, frame the map viewport by setting a center coordinate (latitude and longitude) and a camera distance (in meters):
const map = new mapkit.Map("map-container", {
    center: new mapkit.Coordinate(37.7456, -119.5936),
    cameraDistance: 28000
});
With that, the framework renders an interactive map in your container, centered on Yosemite Valley:
Alternative: Create a Map with frameworks
When using a UI framework, pass in the DOM element directly. For example, in React:
const mapRef = useRef(null);

useEffect(() => {
        new mapkit.Map(mapRef.current, {
            region: new mapkit.CoordinateRegion(
                new mapkit.Coordinate(37.3349, -122.0090),
            new mapkit.CoordinateSpan(0.01, 0.01)
        )
    });
}, []);

return <div ref={mapRef} style={{ width: "500px", height: "500px" }} />;
Add Place Annotations
You can add custom annotations or overlays to the interactive map view. In this example, we’ll showcase places in Yosemite National Park with PlaceAnnotation — an annotation that automatically picks up the place’s title, coordinate, and iconography from Apple’s data.
Each place in Apple Maps is referenced by a Place ID, an opaque string that represents a point of interest rather than a specific coordinate or address. You can find Place IDs with the Place ID Lookup tool or the Search service. New in v6, PlaceLookup returns a promise, so you can pass a Place ID, await the result, and create the annotation in a single flow:
const placeLookup = new mapkit.PlaceLookup();

const id = "I7408F9590EC1AB75";
const place = await placeLookup.getPlace(id);
const annotation = new mapkit.PlaceAnnotation(place, {
    selectionAccessory: new mapkit.PlaceSelectionAccessory()
});

addToList(annotation);
map.addAnnotation(annotation);
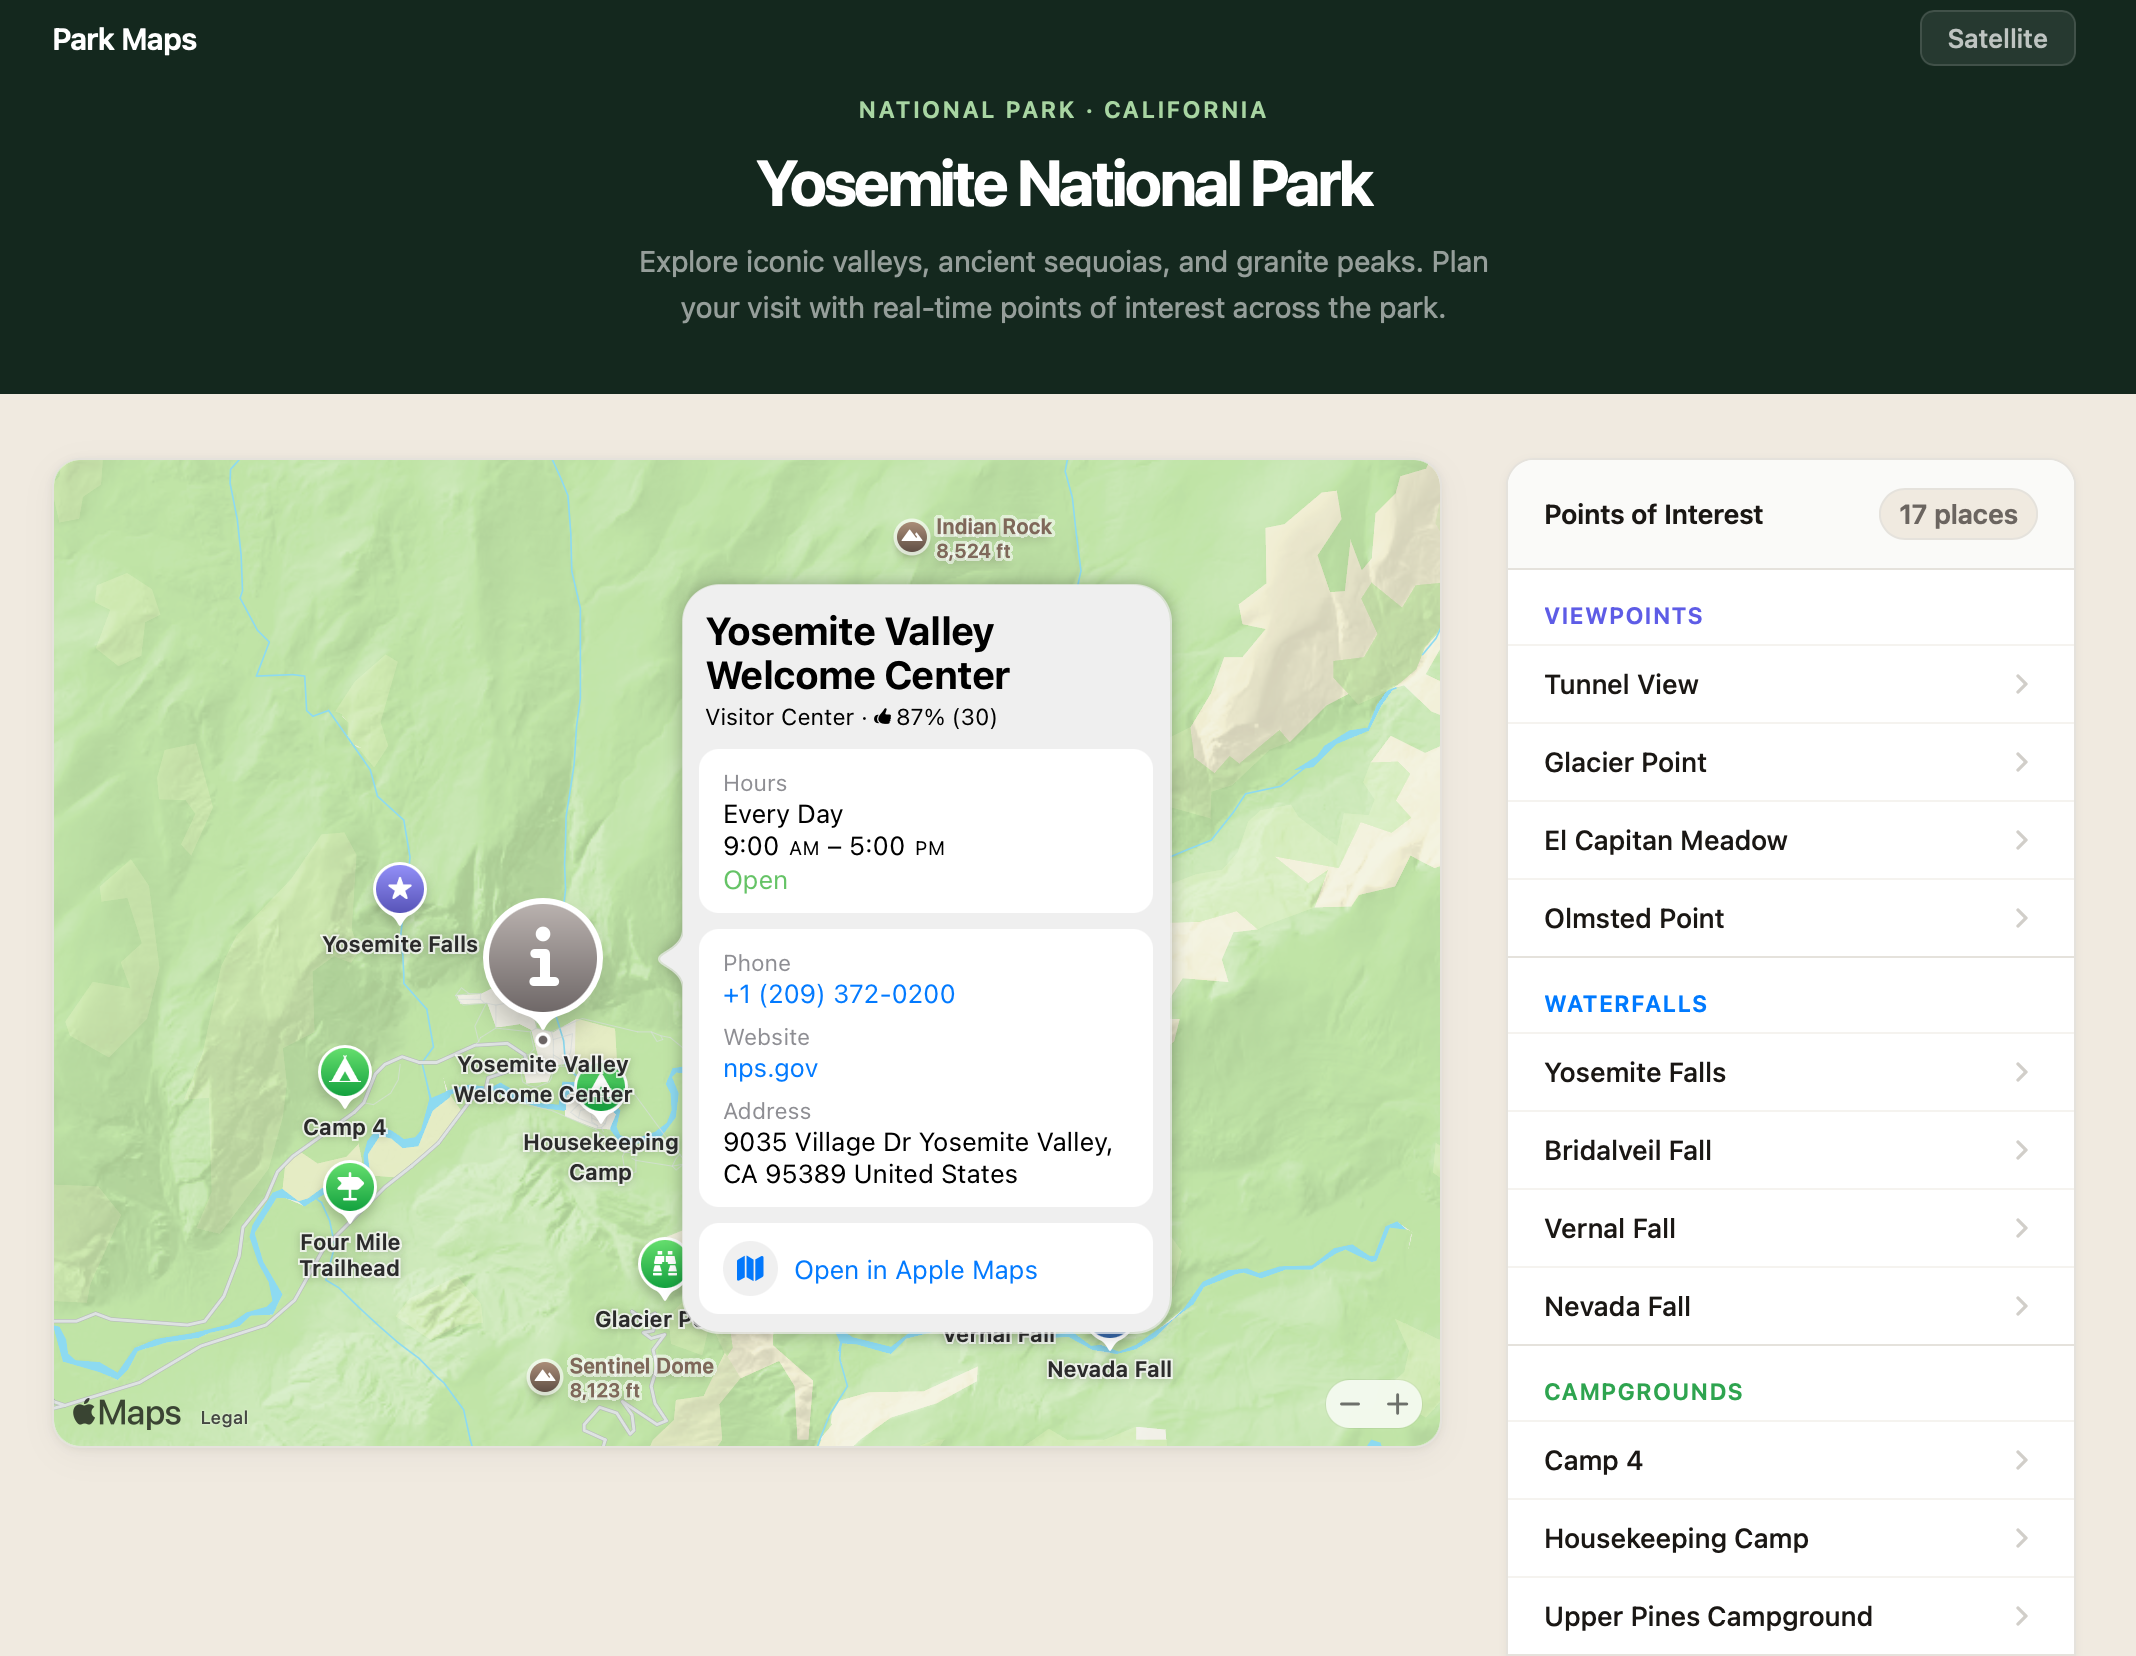
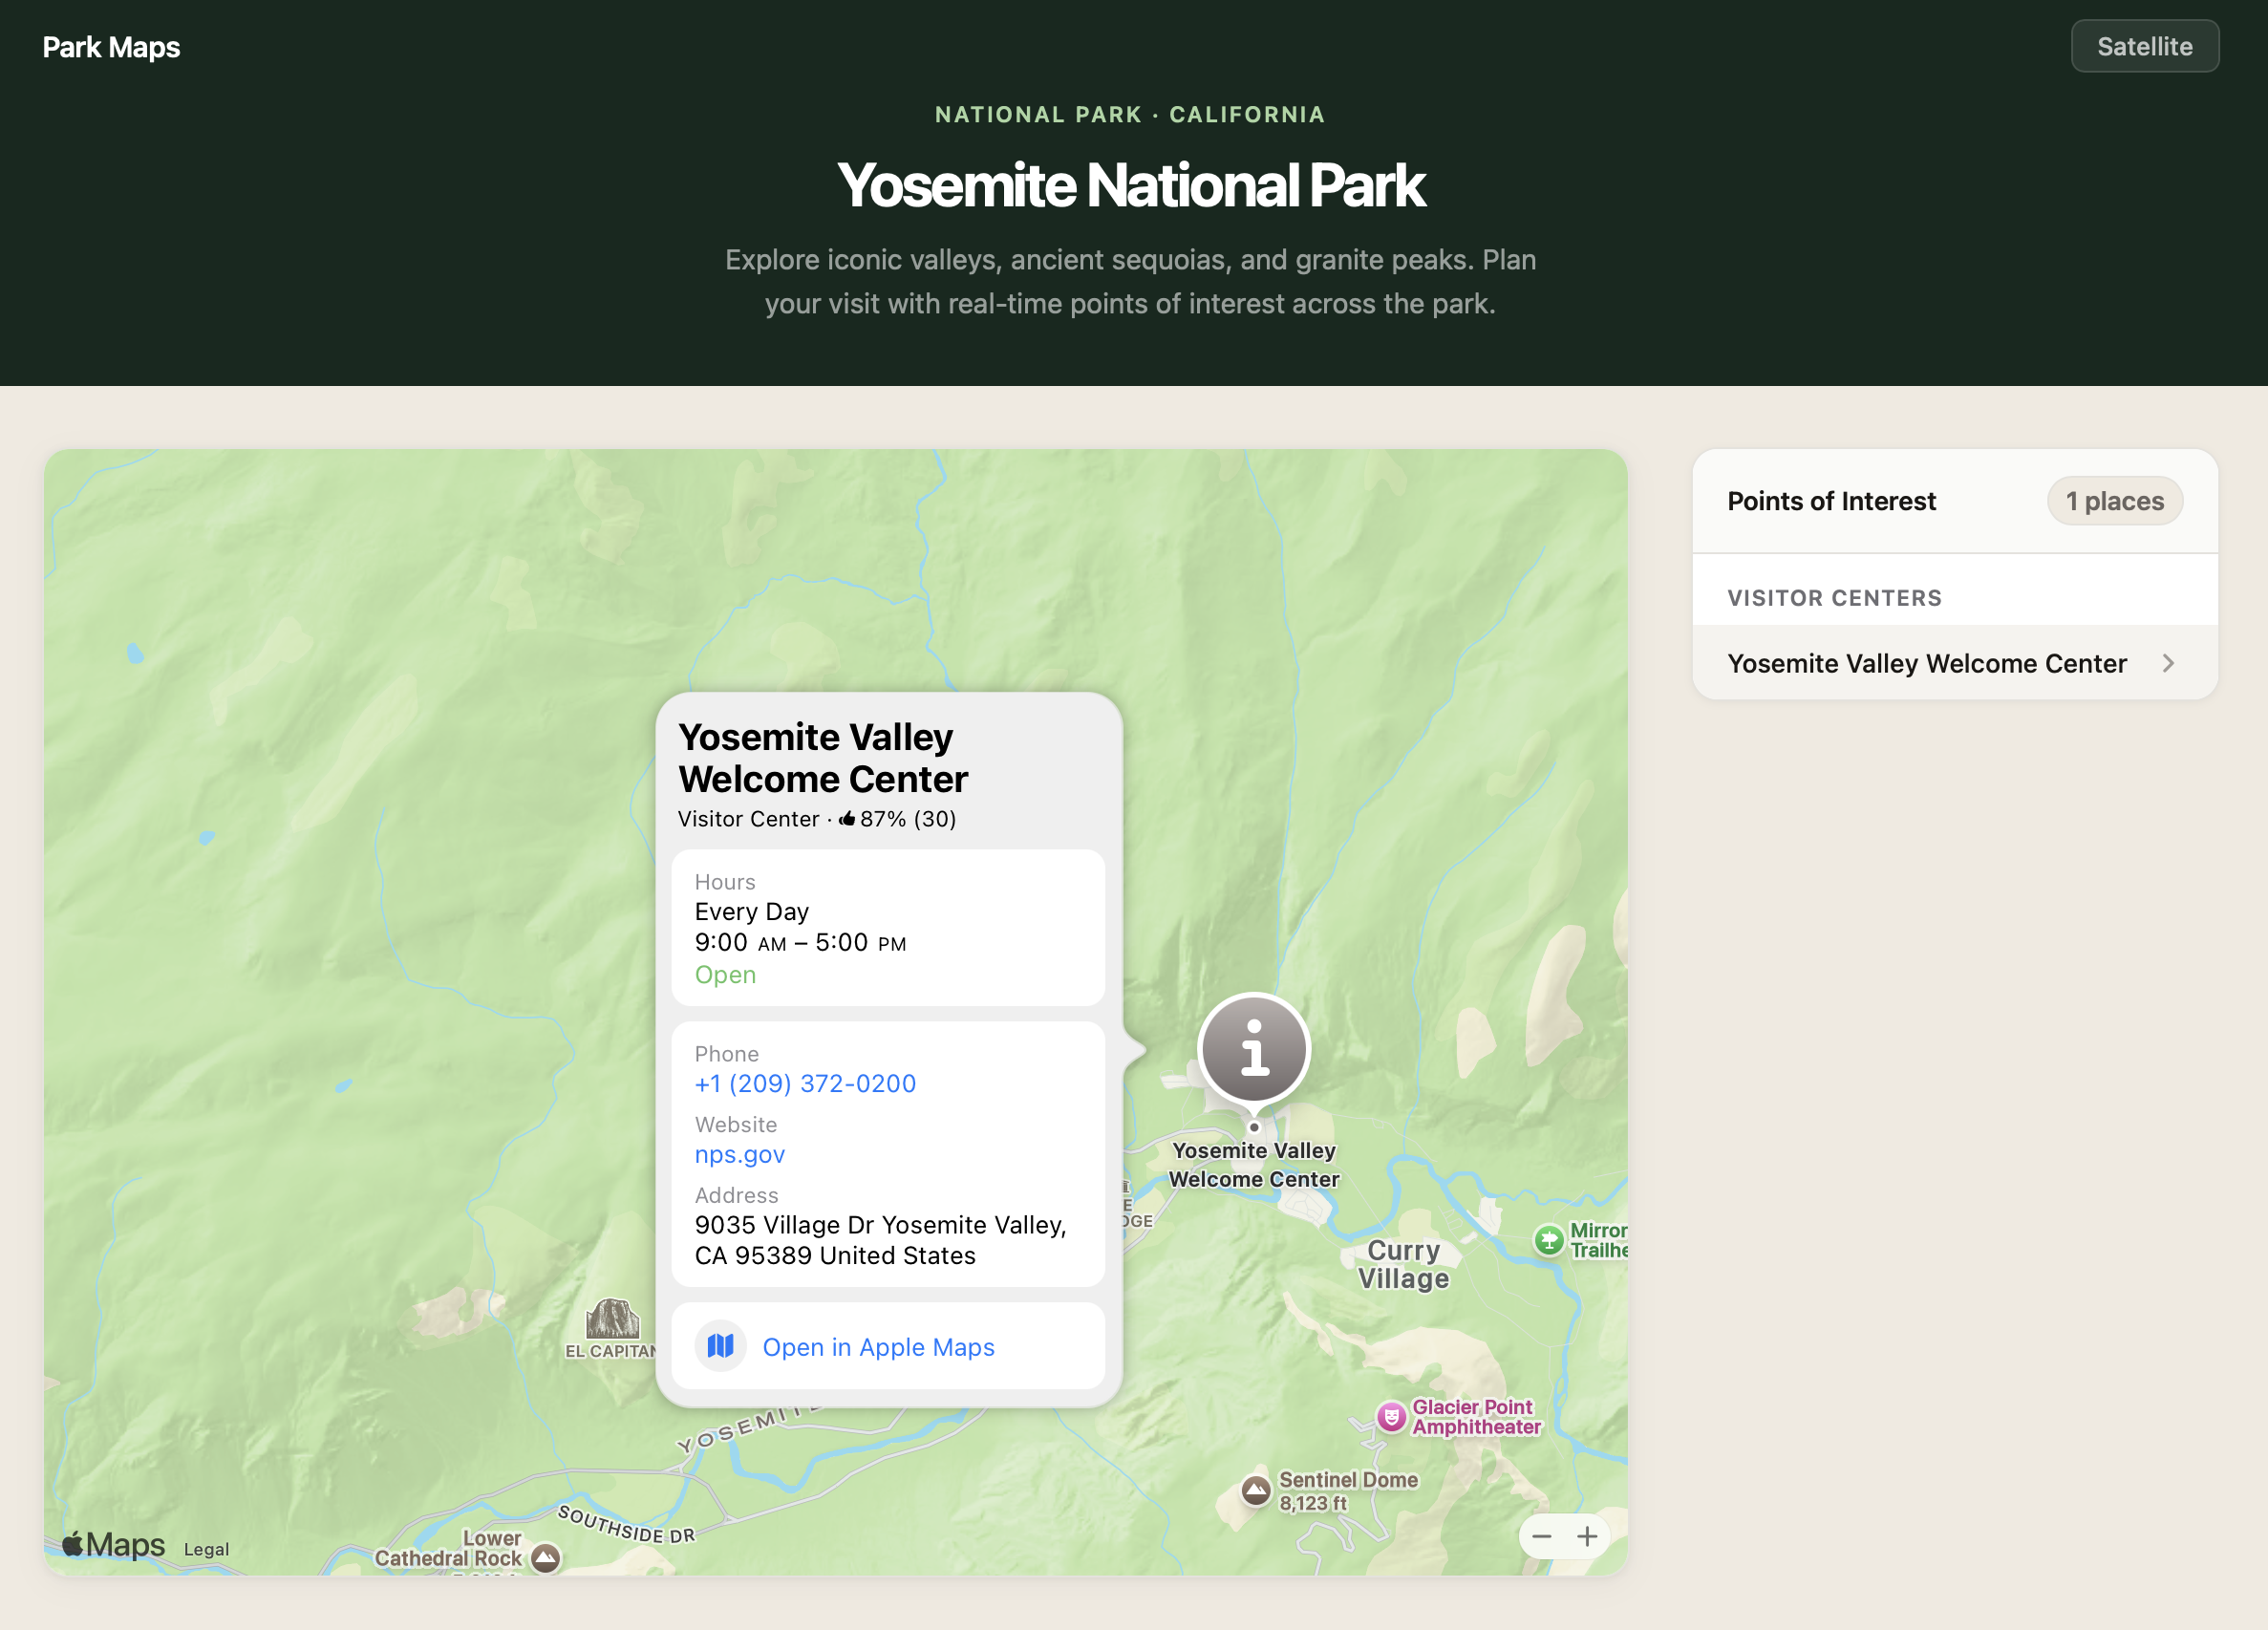
The code snippet above adds a PlaceAnnotation to the map and populates the same place on a list. The list draws the place name using the annotation.title property:
The snippet also sets a selectionAccessory option to a PlaceSelectionAccessory instance. When the user selects a marker, selection accessory displays detailed information of that place, like contact information or operating hours.
Repeat the place lookup to populate the app with all places.
Respond to Interactions
We want to present the user interface in a consistent state. New in v6, MapKit JS uses the standard browser EventTarget model, so handling map events works like handling any other DOM event. When the user selects an annotation on the map, you can update the corresponding list item:
map.addEventListener("select", (event) => {
    const selected = event.annotation;
    setListSelected(selected.id);
});
Likewise, when the user selects a list item, select the corresponding annotation on the map. Since each list item holds a reference to the annotation instance, set its selected property to true:
element.addEventListener("click", (event) => {
    annotation.selected = true;
});
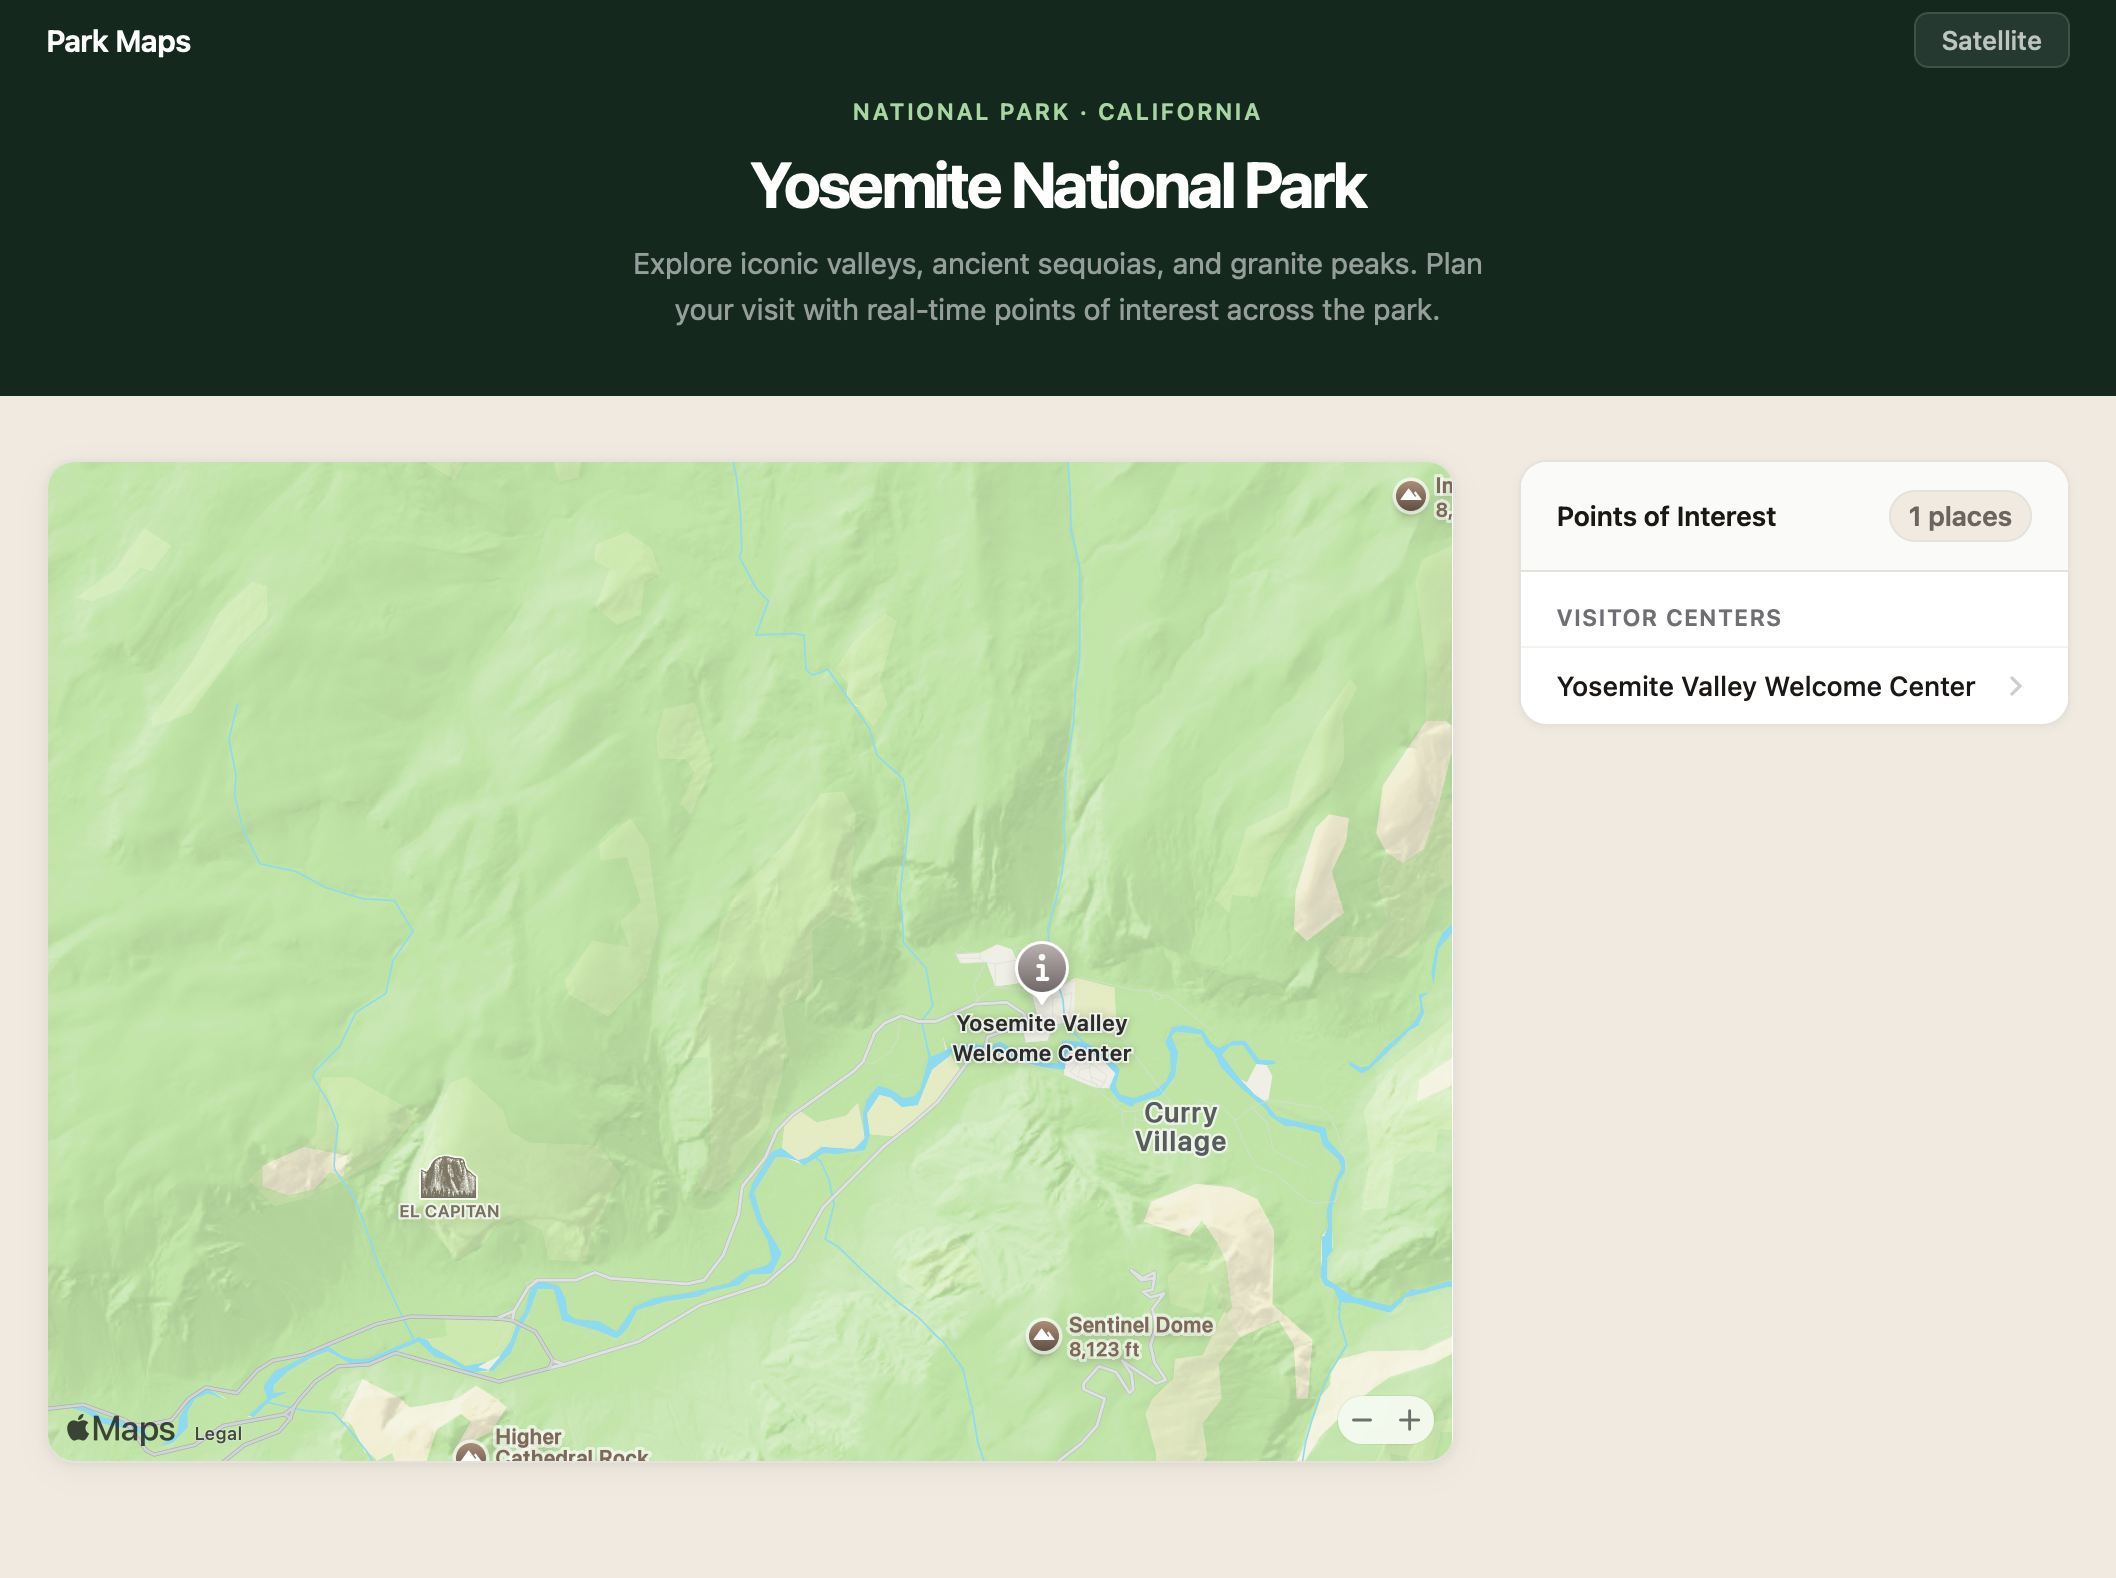
This creates a two-way binding so the list and the map feel connected when either is interacted with. With that, we completed our app:
The same addEventListener pattern applies to annotation selections, map region changes, and every other MapKit JS interaction. See Handling map events to learn about all available event types.
Apple Maps, Built for the Web
In walking through the Yosemite Explorer example, you’ve seen several v6 changes working together. Installing MapKit JS as an npm package makes getting started more straightforward. Handling annotation selection with addEventListener puts the standard browser EventTarget model to work — one that v6 adopts consistently across the API. Using await for place lookups uses native promises throughout. And the authentication token you configured at the start is scoped to specific capabilities, giving you fine-grained control over access. Together, these changes make bringing the power of Apple Maps to your website a natural part of your development process.
Next Steps
Explore the MapKit JS documentation to dive deeper into the API. If you are using an earlier version of MapKit JS, check out the migration guide. Try the code samples in your own project, and share feedback through Feedback Assistant.